

Reason is an efficient music production program consisting of several varieties of fundamental synthesizers sequencers and samplers.
In this procedure, you will see how to trigger raw sounds via a given impulse response from an existing ReDrum channel.
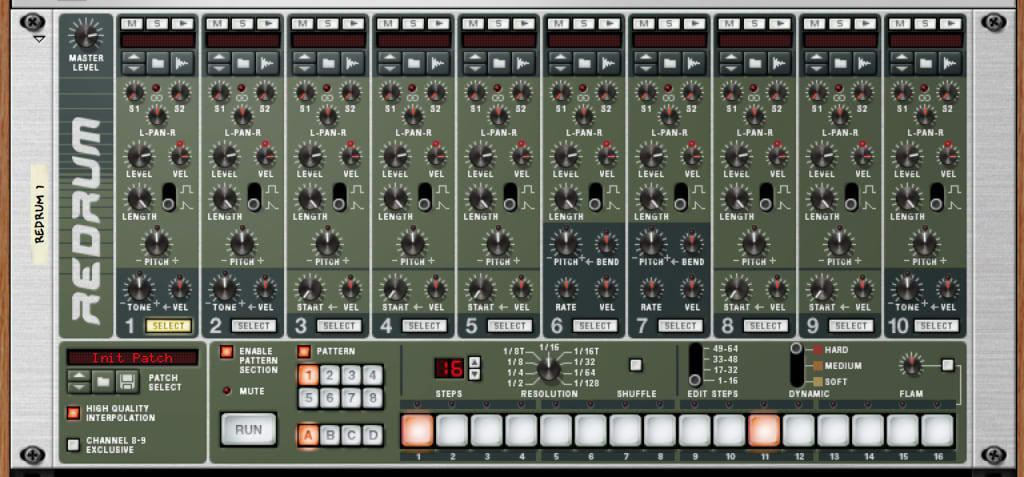
1

ReDrum without any interconnections
Create a simple pattern on the ReDrum drum machine.
Hold down shift and create a ReDrum drum machine to open the device disconnected from any mix channel.
2
Load any sample into the channel five.
You may use a kick drum sample or any other sample.
Cymbals often work well in this slot—you will not hear any direct sound from this channel. Use something with similar contour to the attack of the sub you are visualizing.
Also, load a normal kick drum sample into channel one.
For this slot, an acoustic kick with a click-attack is best.
Samples Loaded on Channel 1 and Channel 5
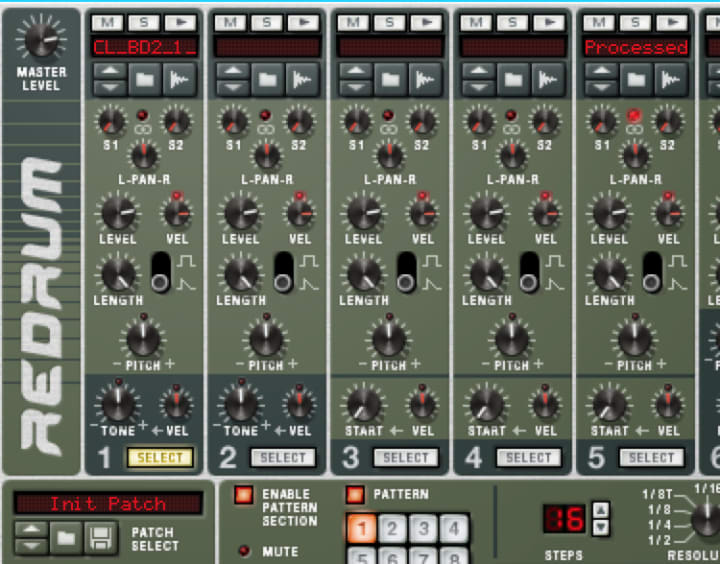
Short Acoustic Kick and Sustaining Ride Cymbal
3
Hold Shift and create an M-Class Compressor.
Connect the ReDrum channel five output to the compressor input.
The cymbal sample will now feed into the compressor.
On the back of the drum machine, take ReDrum channel one "gate out" and connect it to the channel five “gate in.”
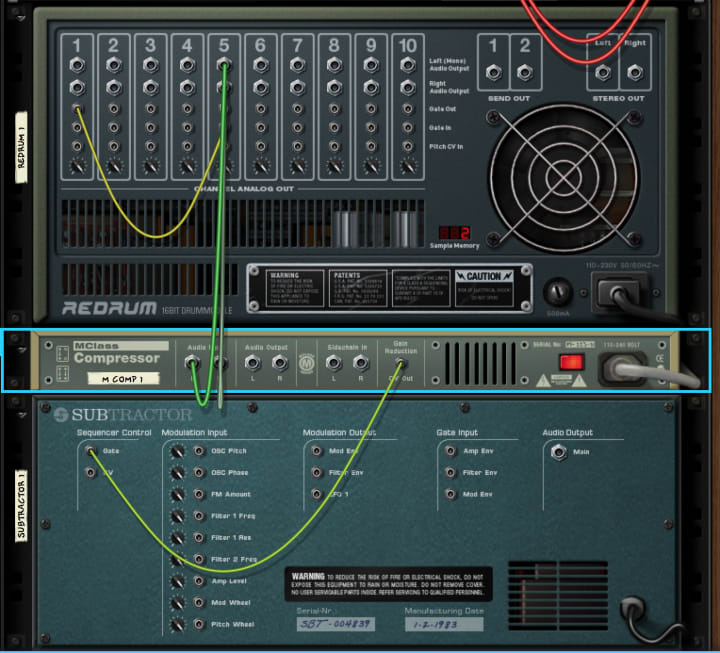
ReDrum/M-Class Interconnections

Channel 1 Triggering Channel 5 | Channel 5 Triggering M-Class Compressor
This creates two layers to the kick.
Notes in channel one have a sharp attack and sub.
Notes in channel five do not have an attack, only sub.
4
Run the drum machine.
Channel five will copy channel one.
5

Channel Five signal is activating the compressor.
As the signal flows into the compressor, lower the threshold until the volume of the signal begins to activate the compressor's meter.
When the signal amplitude meets the threshold amplitude, every dB of amplitude over the threshold equals one unit of bit depth transmitted through the “gain reduction CV out” jack on the back of the compressor.
6
M-Class Compressor Triggering Synthesizer Gate
Hold shift and create any synthesizer.
Right click on the synth and hit “initialize patch” or “reset patch.”
Connect the “Gain reduction CV out” to the synthesizer's “gate in.”

Mix Channel for Redrum Channel 5 Trigger
Create a mix channel (Command+Shift+M) and connect the synth output to the mix channel input.
Also, create a mix channel for ReDrum channel one.
When you run the drum machine, you will hear the sharp attack of the kick, and you will also hear a simultaneous note coming from the synthesizer. The synthesizer will be producing a mid-range tone.
7

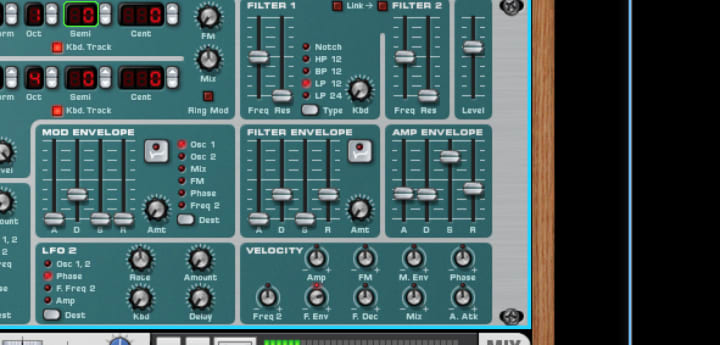
Initialized Oscillator settings
Right click on the synth and "Initialize patch" or "Reset patch."
The synthesizer will initialize to octave 4 sawtooth.
ii
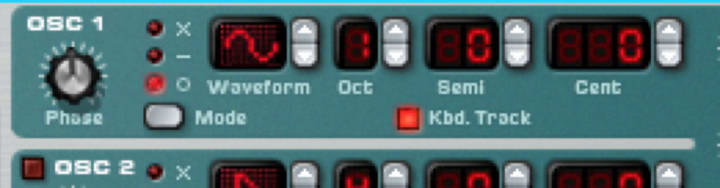
Oscillator tuned to sub range
Change oscillator 1 to a sine wave and drop down to first octave.
Adjust the semitone knob to tune the bass with your sample.
8
Adjust the amplitude envelope to these settings, approximately.
Suggested Amplitude Envelope for Experimentation
Experiment with amplitude envelope to develop the correct contour.
Try different samples in re-drum channel five to see how different samples produce different notes from the sub-synthesizer.
Create a progression.
Create an automation lane for the semitone parameter.
Hold “option” and click the semitone select.
The parameter will turn green and this will create an automation lane in the sequence window. Press F7 to maximize the sequence window.
10

To create an automation region, hold Command and hit the first bar of the "Osc1 Semitone" automation lane you just created.
Leave this value to the root note.
Create a second automation region. Set this to another value.
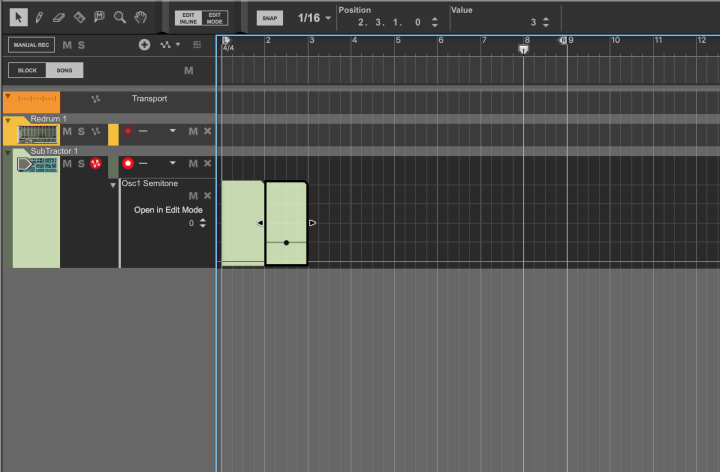
A Second Pitch Value
Once you understand this you can create your own sub-melody.
Automate the octave knob to access more notes octaves.
With this setup, you can add ghost notes to channel five, either by typing MIDI information or adding it to the drum machine's internal sequencer.
Events on channel five will produce a sub tone, but no sharp attack. Events on channel one will always produce sub-tone with an attack.
This can be used anywhere in the bar to create a two-layer kick drum.
In the next installment, I will talk about side chaining, and how you can take advantage of the symbiotic relationship between sample and sub.
About the Creator
Niall LM
Student, Culture Enthusiast, Beatmaker and all-around Creative Individual
Musical Mysteries Unveiled: From Ancient Hymns to Hoof Flutes
In the whimsical realm of ancient melodies, where clay tablets and bone flutes reign supreme, there's a musical mystery that transcends the ages. So, grab your imaginary lyre and let's take a delightful romp through the annals of history as we uncover the oldest tunes ever to grace human ears—and maybe share a chuckle or two along the way!
By NICKSON NJERU4 days ago in Beat


Comments
There are no comments for this story
Be the first to respond and start the conversation.